Smart Cubby

Project Description
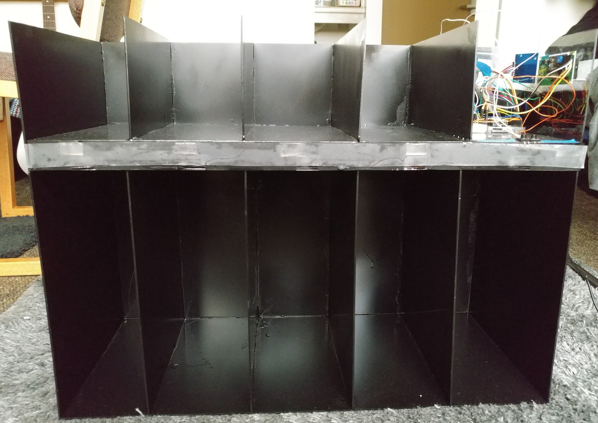
For my sophomore project class, my group and I decided to create a storage solution that integrated Arduino hardware with a mobile app. Initial designs were a backpack insert, and over the door hanging packet, but we settled on the cubby/shelf design as it allowed us more stability and freedom with construction. The final design idea was a shelf built out of plexiglass, with compartments for books and other school related items. These items have a RFID sticker attached to them, which can be “checked in” and out of the shelf, which links the item to a specific slot. The phone app allows the user to set which slots they need on which days of the week, on the specified day, the cubby lights up those slots to indicate these items should be brought to class with you.
My Role
For this project I handled much of the physical soldering and connections, assisted with the construction of the plexiglass structure, and handled the RFID scanning (module and code). Most of the items that came in our Arduino kit were mant for small scale breadboarding, to make use of them in our large plexiglass structure we needed to solder components together to not only extend their range but also make sure the connection stayed secured. Initially we wanted to seal the wires within a rear wall so they stayed out of view, but we settled on taping them to the walls and painting over the tape to hide them. The creation of the code & implementation of the RFID sensor was fairly simple, they provided several sample programs which I merely adapted for our purposes (reading and storing the values). Once the rest of the digital outputs (LEDs) were figured out, and the multiplexing was done, I completed the physical breadboarding.
Lessons Learned
EE 296 is the first group project experience for most engineering majors, and we are given quite a bit of freedom in choosing our group and topic, by choosing to work under Dr. Sasaki and his Arduino/Android development class, I got to experience both halves of Computer Engineering with Arduino Hardware and Android app integration. I needed to learn how to solder and breadboard more efficiently, and how to cut plexiglass for the physical construction. One concept that was very interesting to learn was Charlieplexing, this is the process of using fewer physical digital output ports on the Arduino, and utilizing the one way current of diodes to selectively activate certain LEDs (digital multiplexing). This concept expanded on our knowledge from Digital Design and provided a practical application for it. The usual lessons such as cooperation & communication also applied to this project, although I feel my management skills are so much better now, as this was my first project class, and I was just an inexperienced sophomore working with other sophomores.
The Arduino Code is available upon request, and the MIT App Inventor Code can be found here: ai2.appinventor.mit.edu/?galleryId=4754403452649472